Creating an Ajax enabled Contact Form in Umbraco 6 with ASP.NET MVC 4 and Twitter Bootstrap
In the previous blog post, I covered how to create a Bootstrap enabled responsive website in Umbraco 6 using ASP.NET MVC 4. In this blog post, I intend to build upon the previous post to add a Contact Form, which is one of the key requirements of any simple web site which will email the owner of the site with the contents of the form. The aim of this blog post is two fold, firstly we will see how to write controllers in Umbraco 6 using ASP.NET MVC 4. Secondly, we will see how we can Ajax enable the same contact form in Umbraco 6 for better user experience.
Defining the Contact Us Document Type
Download the source code attached in the previous blog post, load it in Visual Studio and run the website. Login to Umbraco control panel (navigate to http://localhost:<port>/Umbraco) and provide the admin credentials (username: root and password: @123test) to login to the admin control panel. The first step we need to take is to create a new document type for the contact form. In the Umbraco's admin website, click on Settings under Sections to load the site settings.
Expand the Document Types under Settings tree and right click on the [PageBase] document type and select Create from the context menu. In the Create dialog give the name as Contact Us and unselect create a matching template and click Create to create the new document type. Switch to the Tabs tab and create a New Tab with the name Contact Information. Next switch to the Generic Properties tab and add a property with the following details.
Name: Contact Us Contact Information
Alias: contactUsContactInformation
Type: Richtext editor
Tab: Contact Information
We need to allow the Contact Us page to be created below the Home page. Click on the Home document type, switch to the Structure tab, select Contact Us under Allowed child nodetypes and click save icon. This step will allow the Contact Us content page to be created under the content page which uses the Home document type.
Creating the Contact Model
Switch to Visual Studio, right click Models in Solution Explorer and select Add –> Class from the context menu. Give the name as Contact.cs in the Add New Item dialog and click Add to create the new class. Copy paste the code from Listing 1 below to populate the Contact model.
using System;
using System.Collections.Generic;
using System.Linq;
using System.Web;
using System.ComponentModel.DataAnnotations;

namespace MVCUmbraco.Models
{
    public class Contact
    {
        [Required]
        string Name { get; set; }
        [Required]
        [DataType(DataType.EmailAddress)]
        string Email { get; set; }
        [Display(Name="Company Name")]
        string CompanyName { get; set; }
        [Required]
        string Message { get; set; }
    }
}
Listing 1 - Contact.cs - Contact Model class
The above Listing 1 has a simple model for the Contact class. I have used the Required and DataType annotations attributes to ensure that the model has validation on the server and client side. Once we have the model ready, the next step is to create the controller for it. Right click the Controllers folder in Solution Explorer and choose Add –> Controller from the context menu. Provide the Controller Name as ContactController and click Add with default empty template to create a new Controller. Copy paste the code from Listing 2 below into Visual Studio to update the ContactController class.
using System;
using System.Collections.Generic;
using System.Linq;
using System.Web;
using System.Web.Mvc;
using MVCUmbraco.Models;
using System.Net.Mail;
using System.Net;

namespace MVCUmbraco.Controllers
{
    public class ContactController : Umbraco.Web.Mvc.SurfaceController
    {
        [HttpPost]
        public ActionResult SendMail(Contact form)
        {
            string retValue = "There was an error submitting the form, please try again later.";
            if (!ModelState.IsValid)
            {
                return Content(retValue);
            }

            if (ModelState.IsValid)
            {
                //Update your SMTP server credentials
                using (var client = new SmtpClient { Host = "smtp.gmail.com", Port = 587, EnableSsl = true,
                    Credentials = new NetworkCredential("user@gmail.com", "password"),
                    DeliveryMethod = SmtpDeliveryMethod.Network})
                {
                    var mail = new MailMessage();
                    mail.To.Add("user@gmail.com"); // Update your email address
                    mail.From = new MailAddress(form.Email, form.Name);
                    mail.Subject = String.Format("Request to Contact from {0}", form.CompanyName);
                    mail.Body = form.Message;
                    mail.IsBodyHtml = false;
                    try
                {
                        client.Send(mail);
                        retValue = "Your Request for Contact was submitted successfully. We will contact you shortly.";
                    }
                    catch (Exception)
                    {

                        throw;
                    }
                }
            }
            return Content(retValue);
        }
    }
}
Listing 2 – ContactController.cs
Listing two above shows that we inherit our controller class from Umbraco.Web.Mvc.SurfaceController, which is the base class you require to inherit when you plan to use your controller in Umbraco 6. Other parts of the code are simple and they are just sending an email with the contents of the Contact Form. Please make sure you change the SMTP Server credentials and To email address to meet your needs. You can save and compile your visual studio project to ensure there are no errors.
Since we want to use Standard ASP.NET MVC controls and validation we need to update our style sheet to include classes that are used by ASP.NET MVC default validation. Open site.css stylesheet in Visual Studio from Solution Explorer under CSS folder and append the classes shown in Listing 3 in the start of the css file and save the file.
/* Styles for validation helpers
-----------------------------------------------------------*/
.field-validation-error {
    color: #ff0000;
}

.field-validation-valid {
    display: none;
}

.input-validation-error {
    border: 1px solid #ff0000;
    background-color: #ffeeee;
}

.validation-summary-errors {
    font-weight: bold;
    color: #ff0000;
}

.validation-summary-valid {
    display: none;
}
Listing 3 – Updates to site.css
The above classes are used by the ASP.NET MVC framework for showing validation errors. We also need to include the JavaScript files used for Validation as well as Ajax calls. In the previous blog post we had defined the JavaScripts in the PageBase.cshtml template which acts as a Master template for all pages on our site. In solution explorer, expand Views and open PageBase.cshtml file for editing in Visual Studio. You will find the JQuery and Bootstrap JavaScript files included on lines 35 and 36. Copy the code from listing 4 below and paste it at line 37 in the PageBase.cshtml file.
<script src="~/scripts/jquery.validate.min.js"></script>
<script src="~/scripts/jquery.validate.unobtrusive.min.js"></script>
<script src="~/scripts/jquery.unobtrusive-ajax.min.js"></script>
Listing 4 – Include additional script files in PageBase.cshtml
We have included 3 JavaScripts which are required for unobtrusive validation as well as for ajax. I have included these files in the Master template for simplicity purposes, if you wish you can include them on the required pages only. We also need to update the web.config file to enable unobtrusive validation and ajax. Open the web.config file from Solution Explorer and navigate to appSettings section around line 34. Add the following settings from listing 5 below into the appSettings section of your web.config file.
<add key="ClientValidationEnabled" value="true"/>
<add key="UnobtrusiveJavaScriptEnabled" value="true"/>
Listing 5 – Settings to enable Unobtrusive validation and ajax in Umbraco 6
We are now set to define of Contact Form. We define the form as a partial view, Switch to your browsers Umbraco admin, and select Settings from Sections if you are not already there. Right click on Partial Views under Settings and select Create from the context menu. Give the name as ContactForm and click Create to create the new partial view. Copy paste the code from Listing 6 into the Umbraco editor and click the save icon to save the file.
@inherits Umbraco.Web.Mvc.UmbracoViewPage<MVCUmbraco.Models.Contact>
<div id="status"></div>
@using (Ajax.BeginForm("SendMail", "Contact", new AjaxOptions { HttpMethod = "POST",
    InsertionMode = InsertionMode.Replace, UpdateTargetId = "target",
    OnFailure = "ShowError()", OnSuccess = "ShowSuccess()" }))
{

    <fieldset>
        <legend>Fill the form below and we will contact you soon</legend>

        @Html.LabelFor(model => model.Name)
        @Html.EditorFor(model => model.Name) @Html.ValidationMessageFor(model => model.Name)

        @Html.LabelFor(model => model.Email)
        @Html.EditorFor(model => model.Email) @Html.ValidationMessageFor(model => model.Email)

        @Html.LabelFor(model => model.CompanyName)
        @Html.EditorFor(model => model.CompanyName) @Html.ValidationMessageFor(model => model.CompanyName)

        @Html.LabelFor(model => model.Message)
        @Html.TextAreaFor(model => model.Message) @Html.ValidationMessageFor(model => model.Message)<br />

        <input type="submit" class="btn btn-primary" value="Send Message">
    </fieldset>
}

<script>
    function ShowError() {
        $("#status").removeClass();
        $("#status").addClass("alert alert-error");
        $("#status").html("<strong>Error!</strong> There was an error posting the contact form. Please try again later.");
    }

    function ShowSuccess() {
        $("#target").removeClass();
        $("#target").addClass("alert alert-success");
    }
</script>
Listing 6 – ContactForm partial view
You can see from the code above that our partial view inherits from the generic Umbraco.Web.Mvc.UmbracoViewPage<T> class which is instantiated to our MVCUmbraco.Models.Contact class type. We do this so that our Model class is available as a model in our partial view. Next we use Ajax.BeginForm helper to define our Ajax enabled form, just like we use in normal ASP.NET MVC 4 forms. We pass the action and controller name as parameters, make sure you have them correctly defined else your form will keep giving all kinds of errors. We also pass an AjaxOptions object to the helper and define that we want to replace the contents of the target div upon success of the form. We also hook up the OnFailure and OnSuccess client side events to appropriate JavaScript methods. We then define the the MVC controls for the Model. You will note that the form has been styled as per Bootstrap guidelines. The ShowError and ShowSuccess JavaScript methods use appropriate Bootstrap classes to display styled alerts.
We now need to create a Template for the Contact form which will have the view for the form. Expand the Templates node under Settings and right click on [PageBase] and select Create from the context menu. Provide the Name as Contact Us and click Create in the dialog to create a new template for Contact Us page under the [PageBase] template. Cope paste the code from Listing 7 into the Umbraco editor and click on the save icon to save the file.
@inherits Umbraco.Web.Mvc.UmbracoTemplatePage

@{
    Layout = "PageBase.cshtml";
    var contact = new MVCUmbraco.Models.Contact();
}
@section content{
    <div class="span3">
        <div class="well sidebar-nav">
            @Umbraco.Field("contactUsContactInformation")
        </div>
        <!--/.well -->
    </div>
    <!--/span-->
    <div class="span9">
        <div id="target">
            <h1>Write to Us</h1>
            @Html.Partial("ContactForm", contact)
        </div>
    </div>
    <!--/span-->
}
Listing 7 – Contact Us template
In the above Listing 7 we have defined a variable contact which is an instance of our model class and is used to pass the model to the partial view. We have also used Bootstrap formatting and divided the page into two major areas one having the contactUsContactInformation Umbraco field and another including our ContactForm partial view.
We need to set this as the default template for the Contact Us document type. Expand Document Types under Settings and select Contact Us under the[PageBase] document type. Select Contact Us as the Default Template and click the save icon so that the Contact Us template is used as the default template for the Contact Us document type.
Now that we have the Contact Us document type and template all set, we need to create the Contact Us page. Click on Content under Settings and right-click on the Home page under Content tree and select Create from the context menu. In the create dialog provide the page name as Contact Us and choose the document type as Contact Us and click Create to create the content page. Provide the appropriate Contact Information (your address) under the Contact Information tab, then switch to the Generic Properties tab and provide the information for the SEO Title and SEO Description for the page. Now you are all set, click Save and Publish icon to save and publish the page. The figures below show screenshot of the application in various stages. Please note that if you are having errors with the form the first step to trouble shoot is to ensure that you have provided the right SMTP configuration details in the ContactControler class.
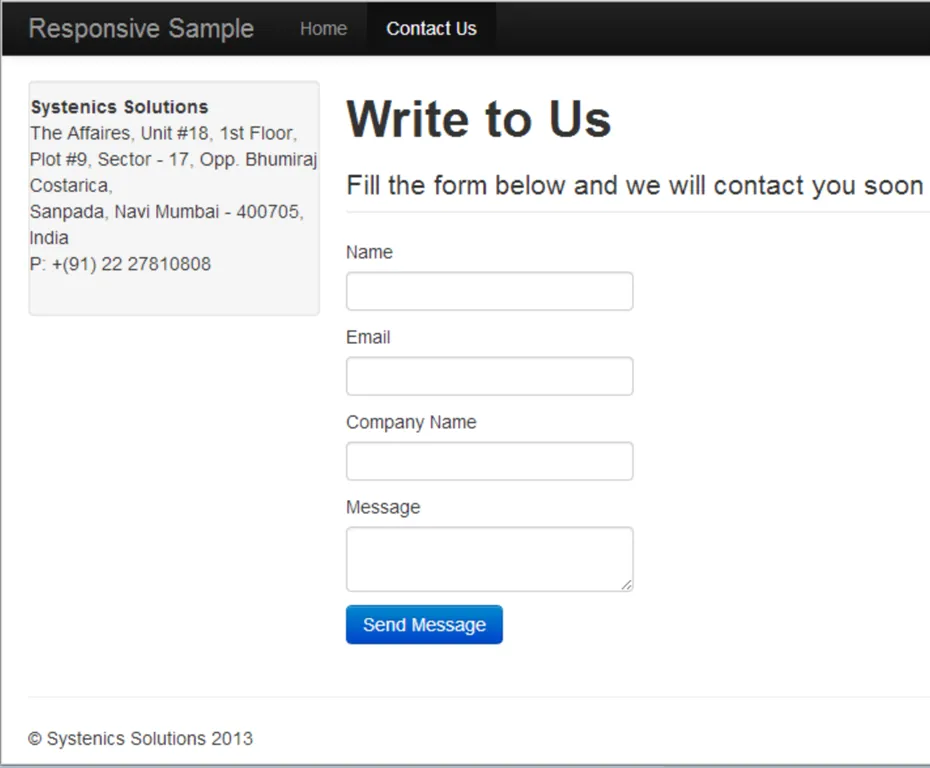
Figure 1 - Ajax Enabled Contact Form
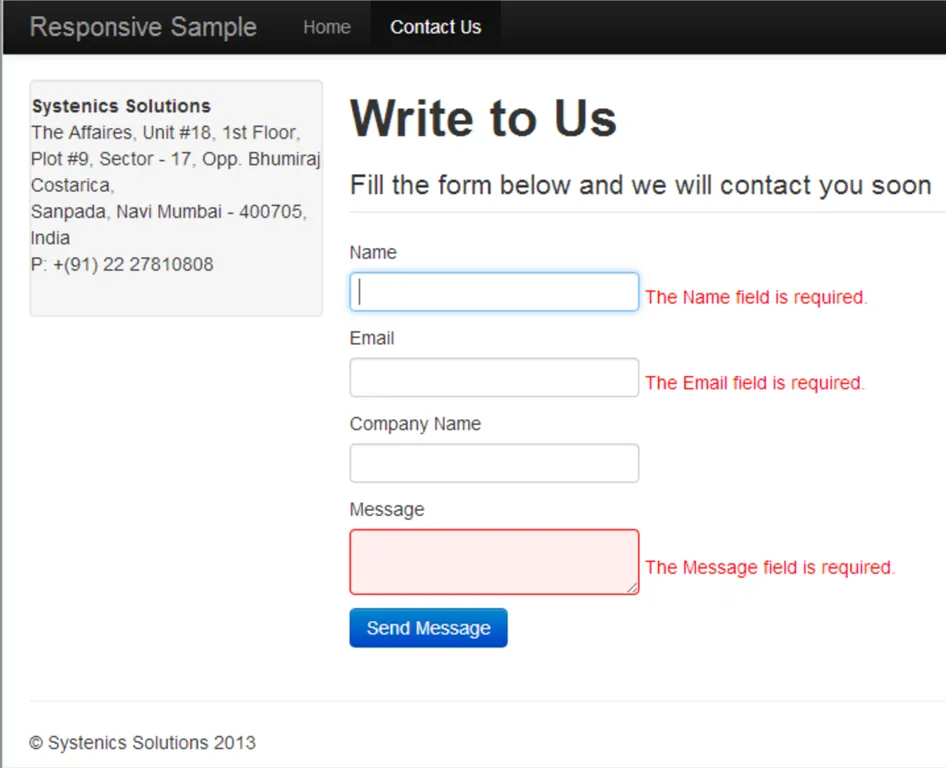
Figure 2 - Client Side validation errors
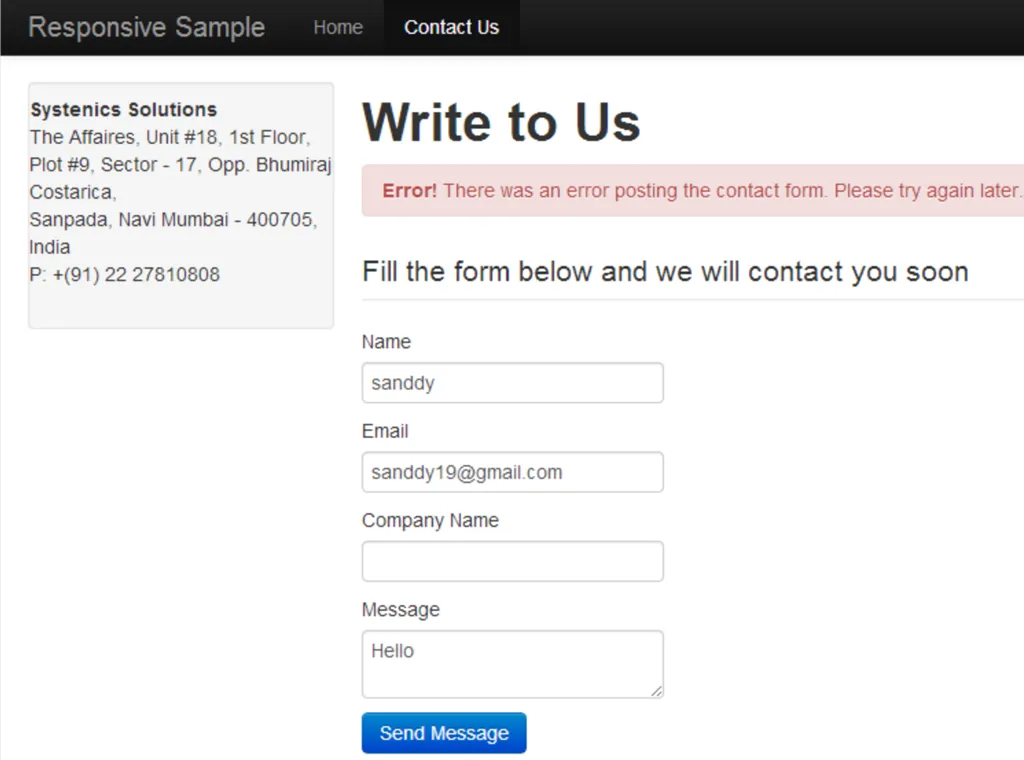
Figure 3 – Server Side error sending email
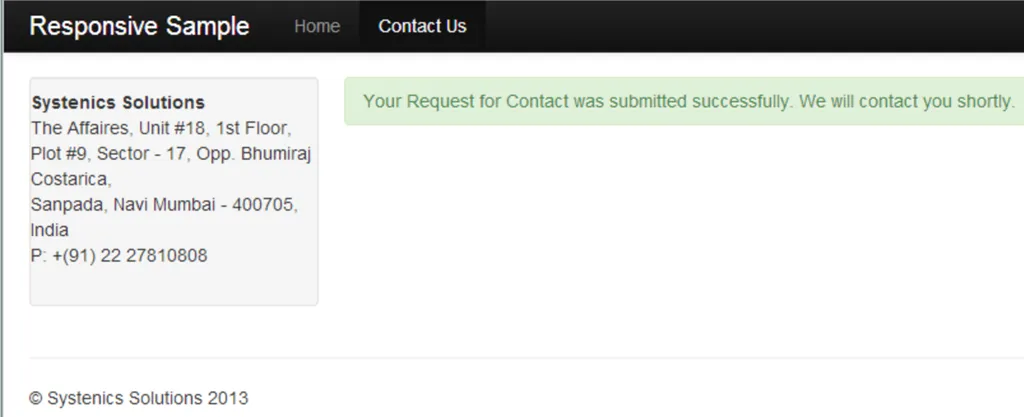
Figure 4 – Success submitting the form
In this blog post we saw the process of building an Ajax enabled Contact Form in Umbraco 6 using Bootstrap and ASP.NET MVC 4. You can apply similar concepts to build other Ajax enabled forms for your site. We also saw the process of adding a new document type, template and partial view for the contact form in Umbraco 6.
Downloads
Click here to download the sample code for this article.
Need help implementing this for your business?
Our team helps plan, build, and scale marketplace and auction workflows. Exploreindustry solutions,platform products, andcustom development servicestailored to your goals.